To install the Juniper vSRX appliance on ESXi 6/6.5, the following things needed to be done.
Initial Installation/VM Setup
- Deploy the OVA file as usual.
- Once the OVA has been deployed, edit the VM settings (right click the VM -> Edit Settings). Make sure you are using the Flash client for this.
- Select the “VM Options” tab at the top, expand the “Advanced” settings and then click on “Edit Configuration”.
- Check if there is already an entry for “numa.nodeAffinity”. If there is not, add an entry for this and set to 0 (depending on your hardware configuration, this can be set to 1 or another value but I recommend 0). The setting should look like this:
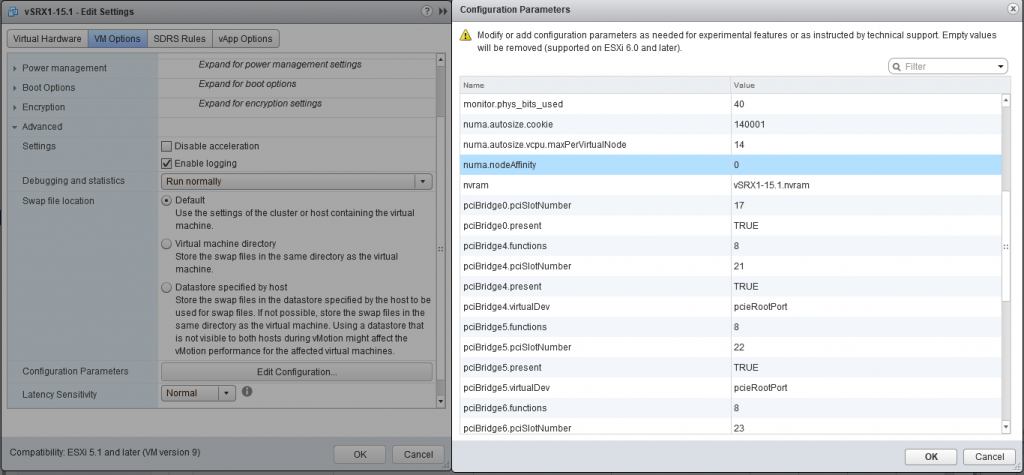
- Click ok to save the above settings.
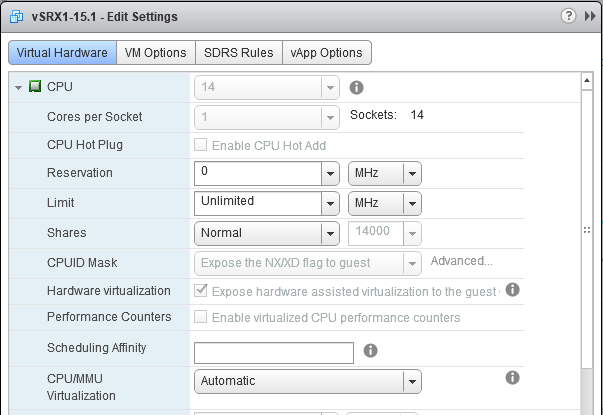
- Go to the “Virtual Hardware” tab.
- Expand the CPU setting and set the required number of CPU’s that you would like the VM to have. It is important that “Cores per Socket” is set to 1 (so that the VM will use 1 socket per vCPU). Without setting that value my VM’s would boot but no ge-* interfaces would show up. For my VM’s I assign 14 vCPU’s.
- Make sure that the “CPUID Mask” setting is set to “Expose the NX/XD flag to guest”.
- Make sure that the “Hardware virtualization” setting is checked. The completed CPU settings should look like this:
CPU/RAM Tweaks
These settings depend on the resources available on the server as well as the resources assigned to the vSRX VM – adjust these to suite.
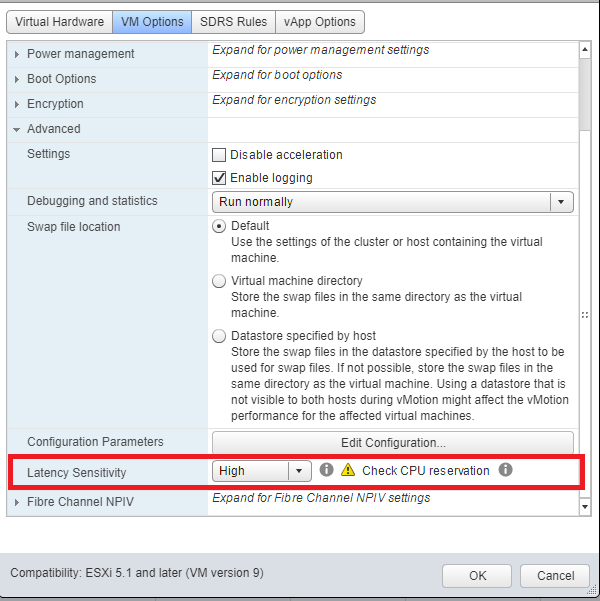
- In the VM settings go to the “VM Options” tab. Expand “Advanced” and select the “High” Latency Sensitivity option like this:
After changing that setting, you will need to reserve the CPU and RAM resources like this:
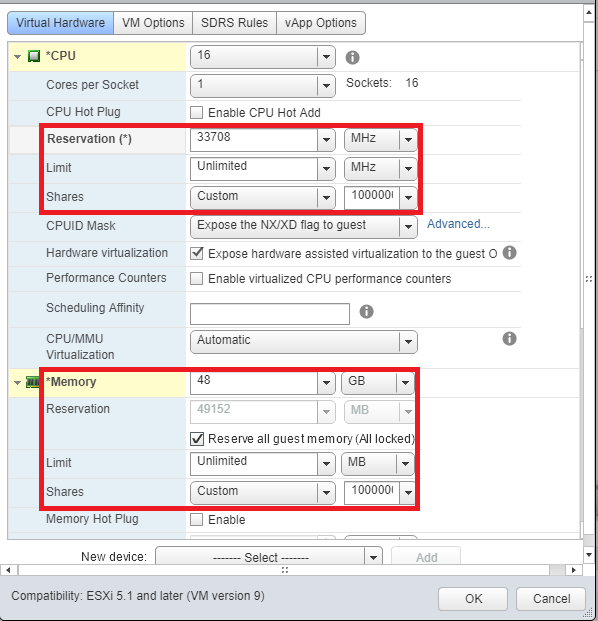
Note that in the above screenshot I have set the limit/shares values as well – I do not have any other VM’s running on these hosts.
If you do not set this setting you may experience scheduler slip issues and crashing – this is common if there is a reasonable amount of traffic going through the VM and other guests present on the host.
NIC Tweaks
There are a few recommended settings by Juniper for the VMWare NIC’s when using VMXNET 3. These settings do not apply to PCI passthrough NIC’s. Refer to this document for more information on these. These settings must be set in the advanced settings editor (step 3 during the installation instructions above), they cannot be set via the standard options.
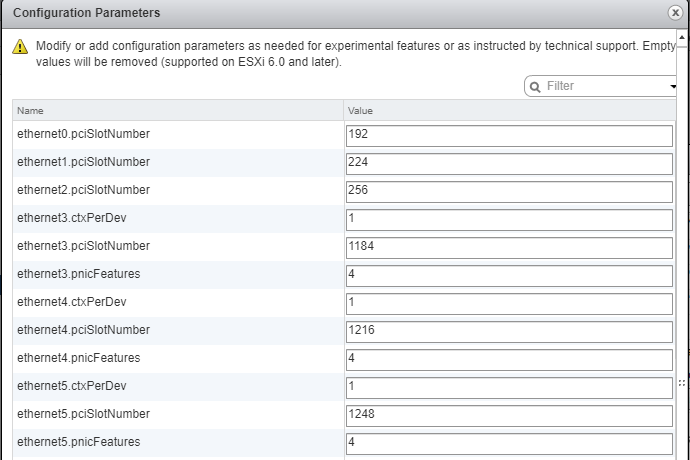
ethernetX.ctxPerDevset to1for each revenue NIC: This will assign a TX thread to each vNIC. You will need to replace theXin the setting with the NIC number. As an example, the vSRX VM I have deployed has 6 NIC’s assigned total, NIC’s 0-2 are not revenue ports so I have added the settingethernet3.ctxPerDev=1,ethernet4.ctxPerDev=1,ethernet5.ctxPerDev=1. This setting should not be set for any non-revenue ports.ethernetX.pnicFeaturesset to 4 for each revenue NIC: This will enable RSS queues for the vNIC. As above, you will need to replace theXin the setting with the NIC number. This setting should not be set for any non-revenue ports.
The completed settings look like this:
PCI Passthrough NIC’s
If you have NIC’s that support PCI passthrough and they are also supported by the vSRX these can be used instead of the virtualised VMXNET interfaces.
Note: If you are using PCI Passthrough NIC’s there must still be a singke VMXNET3 adapter for the VM. This adapter will be used for the management (em0) interface.
Host Configuration
As I am running vCenter my example has the changes being applied from the vCenter web interface. You can apply these same changes directly from the hosts interface but they are located in a slightly different spot.
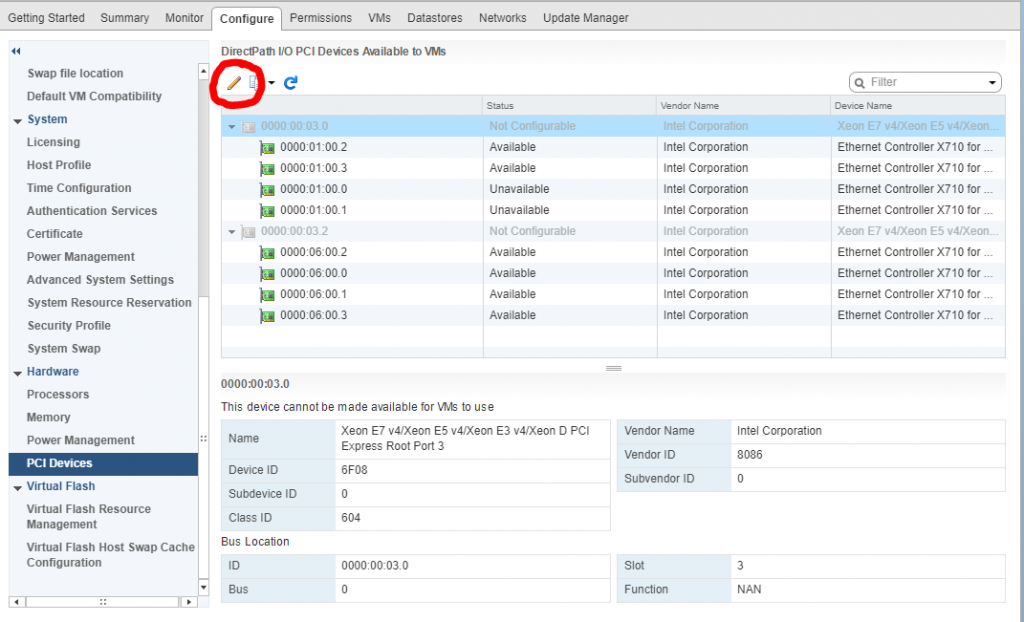
- In vCenter, go to the host configuration.
- On the left menu, scroll down to the “PCI Devices” configuration (under “Hardware”).
- Click the pencil icon at the top to edit the configuration. It should look like this:
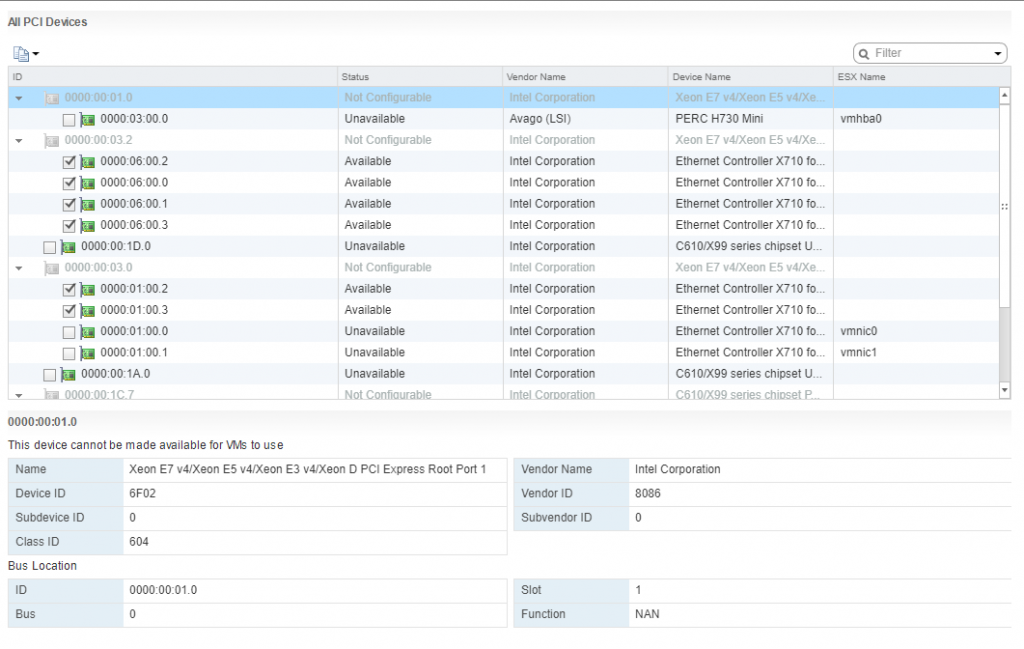
4. Select the box next to the PCI ID of the NIC’s that you will assign to the vSRX. You should not be selecting any NIC’s that are used by ESXi – check the “ESX Name” field is empty. You will get a screen that looks like this:
Save those settings. Any changes (enabling or disabling devices for PCI passthrough) will require a reboot of the host, so reboot the host before continuing.
VM Configuration
- Edit the vSRX VM configuration.
- Select the “New device” menu and choose “PCI Device” then click add. You can repeat this process for each PCI passthrough NIC to add. When the device has been added to the VM make sure that you select the correct PCI ID for each device.
- Select the “VM Options” heading at the top and go to Advanced and click “Edit Configuration”.
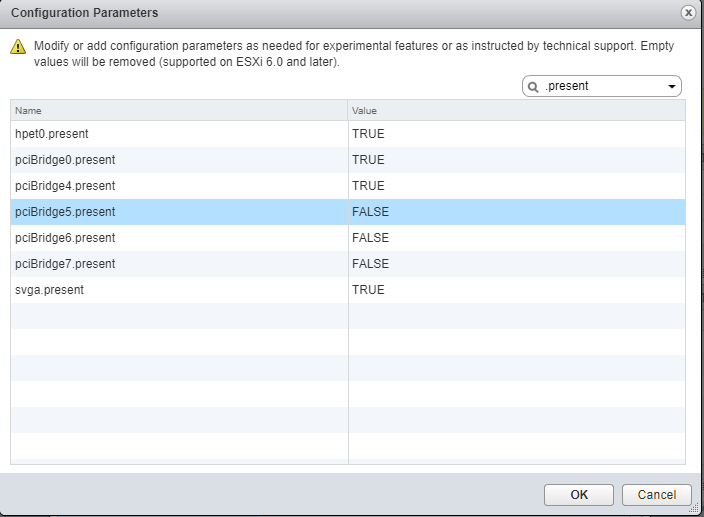
- Search for
.present. The settings forpciBridge5.present,pciBridge6.presentandpciBridge7.presentneed to be set to FALSE. It should look like this:
If you do not change this setting, the VM will not be able to see all interfaces you define.
The settings for the VM can be saved and you should be able to then start the VM.